Would you like to add professional-looking scrolling credits to your video?
If you are a CapCut user, then you can do this easily. Whether you’re wrapping up a short film or a YouTube video, this step-by-step guide will show you how to create smooth scrolling credits on CapCut PC.
Let’s see the process in and make your video credits pop in just a few clicks!
Steps to Professional Credit Title Tutorial in CapCut PC
Step #1
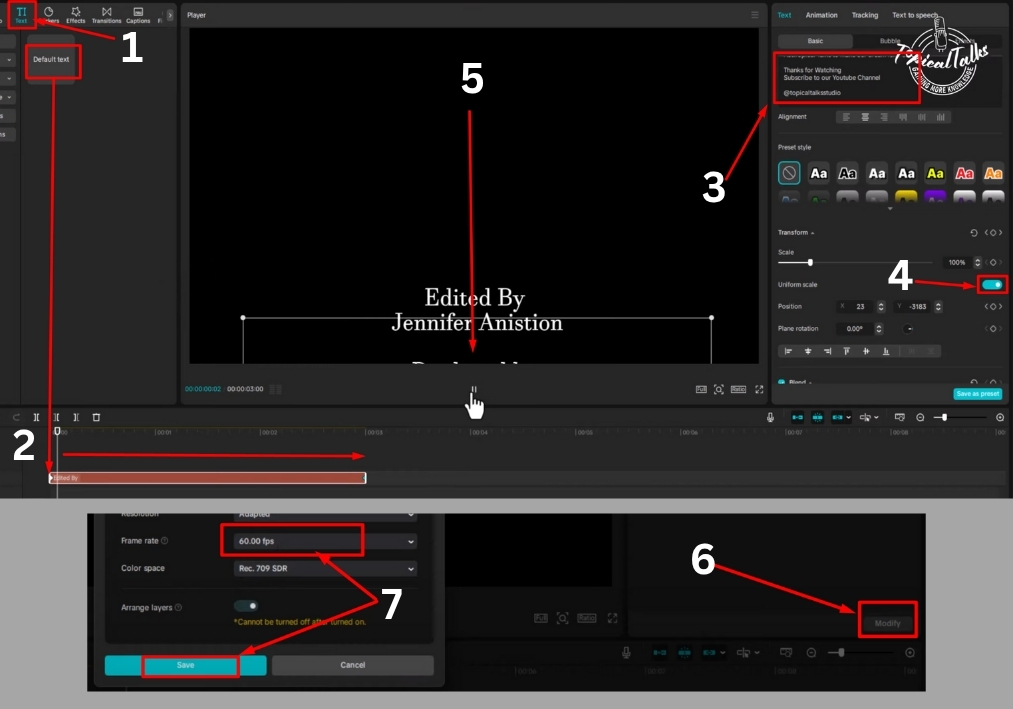
Start by opening CapCut on your PC. Look at the toolbar and select the Text option. Choose the Default Text and drag it onto your timeline. This will be the base for your credits.
Step #2
Click on the text box in the timeline and type in your credits. Include names, roles, or anything else you want to feature. Keep it clear and concise.
Step #3
With the text selected, tweak the font size to make it readable. You can find this option in the text settings. Play around until it looks just right for your video.
Step #4
Move the playhead (that little cursor on the timeline) to the first frame of your text layer. Click the Keyframe button to mark this spot. Then, left-click, hold, and drag the text downward, so it’s positioned off-screen at the bottom.
Step #5
Now, move the playhead to the end of the text layer. Add another Keyframe. Left-click, hold, and drag the text upward, so it moves off-screen at the top. This creates the scrolling motion from bottom to top.
Step #6
Hit play to preview your scrolling credits. If the scrolling looks rough, it might be due to the frame rate. Go to the Modify settings in CapCut and change the frame rate from 30 fps to 60 fps. This makes the animation smoother and more professional.
Step #7
Play your video again to check the credits. They should now scroll seamlessly from bottom to top, giving your project that polished look.
And that’s it!
You’ve just created scrolling credits in CapCut PC. It’s a simple trick that adds a professional touch to any video.