Got unwanted noise messing up your iPhone videos? No worries, you don’t need any third-party apps to fix it. Most of the time, it could be background chatter, wind, or hums; your iPhone has a built-in way to clean up your audio.
In this quick guide, I will show you exactly how to remove background noise from your video using simple steps, right on your iPhone.
Simple Steps to Remove Background Noise from iPhone
Step #1
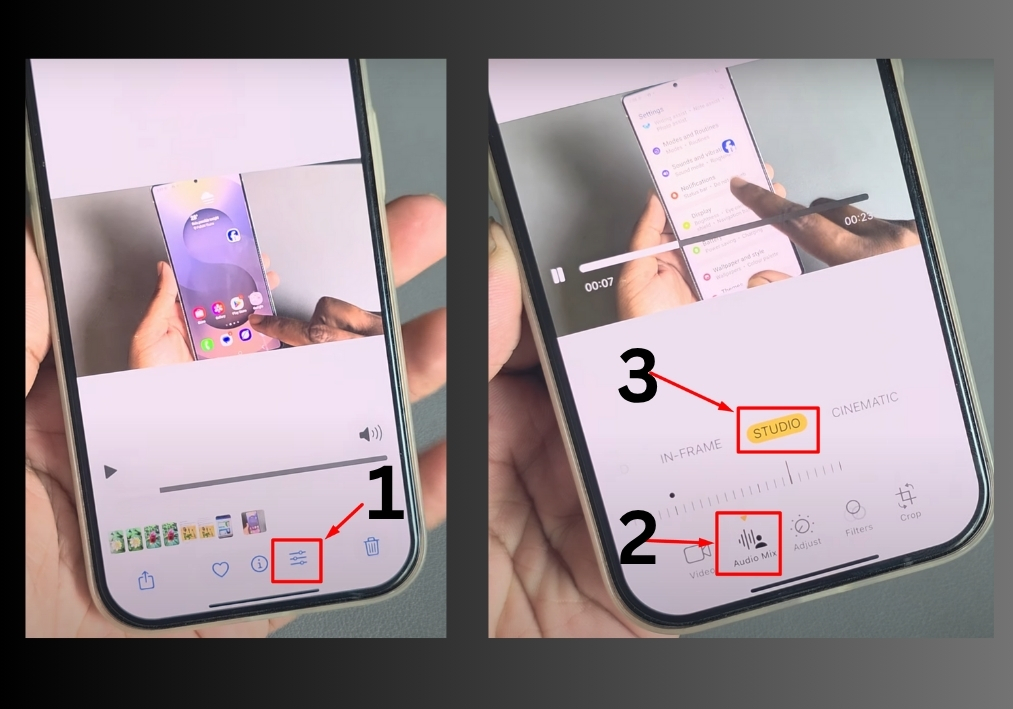
Start by opening the video you want to edit on your iPhone. Look for the three-dot menu (in the top-right corner of the video editing app). Tap it to access more options.
Step #2
From the menu, select Audio. You will see options like In Frame and Studio. For background noise removal, choose Studio. This mode is designed to enhance audio quality by reducing unwanted sounds.
Step #3
After selecting Studio, head to the Settings menu. Here, you will find an option labeled No Voice. This is the key to removing background noise. Tap it to enable the feature.
Step #4
If you want to compare the before and after, then simply press the side button on your iPhone to toggle between the original audio and the noise-free version. This lets you hear the difference and ensure the noise is gone.
Step #5
Once you are happy with the audio, tap Save. Your iPhone will process the video and save it without the background noise.
And that’s it!
You have cleaned up your audio; fast and simple, right from your iPhone.