
If you’ve ever cut out an object in Photoshop, you might have noticed annoying white edges hanging around the subject. These little ghost lines can ruin an otherwise clean edit. The good news? There’s a quick and simple way to get rid of them without any guesswork.
In this tutorial, we’ll walk through exactly how to make those white edges disappear and leave your image looking sharp and polished.
Step-by-Step Guide to Remove White Edges
Step 1: Select the Subject
First, click on your image layer. Now hold down the Ctrl key (or CMD if you’re on a Mac) and click directly on the layer thumbnail. This selects just the subject you’ve cut out.
Step 2: Add a Layer Mask
Once the subject is selected, hit the mask icon at the bottom of the Layers panel. This applies the selection as a layer mask, which will come in handy for cleaner edits.
Step 3: Use the Minimum Filter
Go to the top menu and click Filter.
Hover over Other, then choose Minimum.
This filter helps tighten up the edges by shrinking the mask just slightly, perfect for wiping out those leftover white outlines.
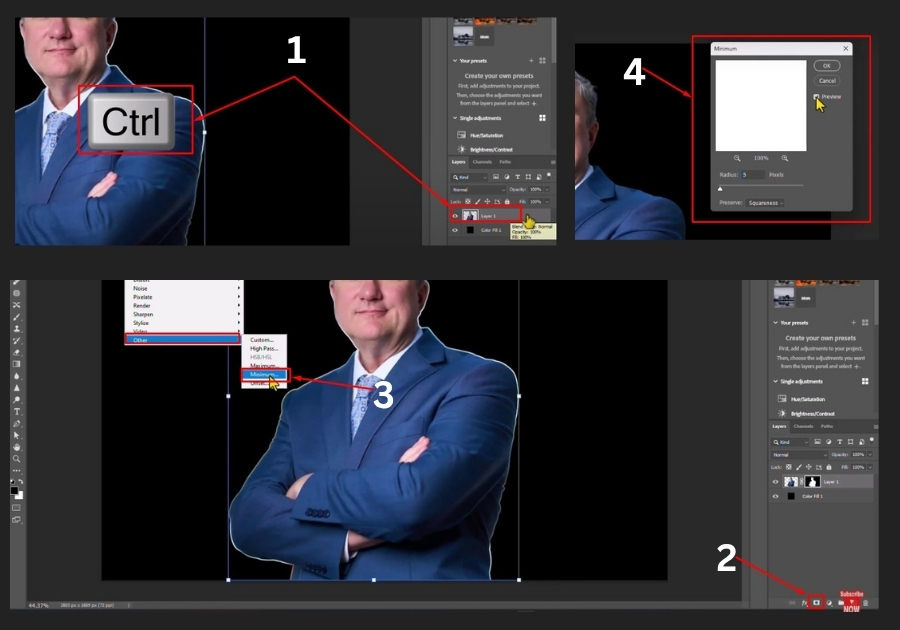
Step 4: Adjust the Radius
Make sure the Preview box is checked so you can see the changes in real time. Now, slowly adjust the Radius slider. Increase it just enough until the white edges disappear. Usually, a small amount does the trick; don’t overdo it.
Step 5: Click OK
Once you’re happy with how the edges look, click OK to apply the filter.
When to Use This Technique
This method works best for:
- Images with light backgrounds that create white halos
- Cutout subjects placed on different backgrounds
- Photos where edge refinement tools haven’t completely solved the problem
- Quick fixes when you need clean results fast
And that’s all!
It’s a fast, effective fix that makes your work look more professional in seconds. Try it next time you’re dealing with tricky edges, you’ll wonder how you ever worked without it.