Want to swap out a boring video background for something more exciting? Maybe you shot a clip against a green screen or just want to replace a plain wall with a cool scene. Adobe Premiere Pro makes it super easy to remove a video’s background and add a new one.
With just a few clicks, you can swap out boring backgrounds for something more interesting. This quick guide walks you through the process step by step.
REMOVE The BACKGROUND From VIDEO in Premiere Pro
Step 1: Search for the “Color Key” Effect
Open your Premiere Pro project and head over to the Effects panel. In the search bar, type “Color Key.” You will see it pop up in the list. Drag and drop the Color Key effect onto the clip where you want to remove the background.
Step 2: Use the Color Picker
Now, click on your clip and go to the Effect Controls panel. Under the Color Key effect, you will see an eyedropper tool (also called the color picker). Click it.
Then, move to your video preview window and simply click on the background color you want to remove. Make sure you select a solid color, it works best if your background is plain or uniform.
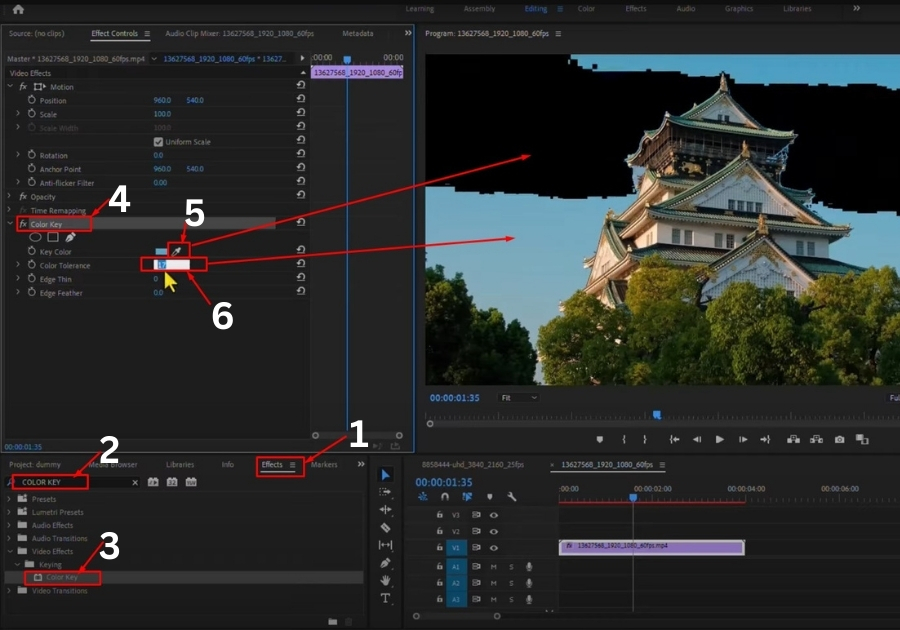
Step 3: Adjust Color Tolerance
After picking the color, it won’t look perfect right away. You will need to tweak the Color Tolerance setting. Start increasing the value slowly, and watch the background disappear. Stop once most of the background is gone, but your subject still looks sharp.
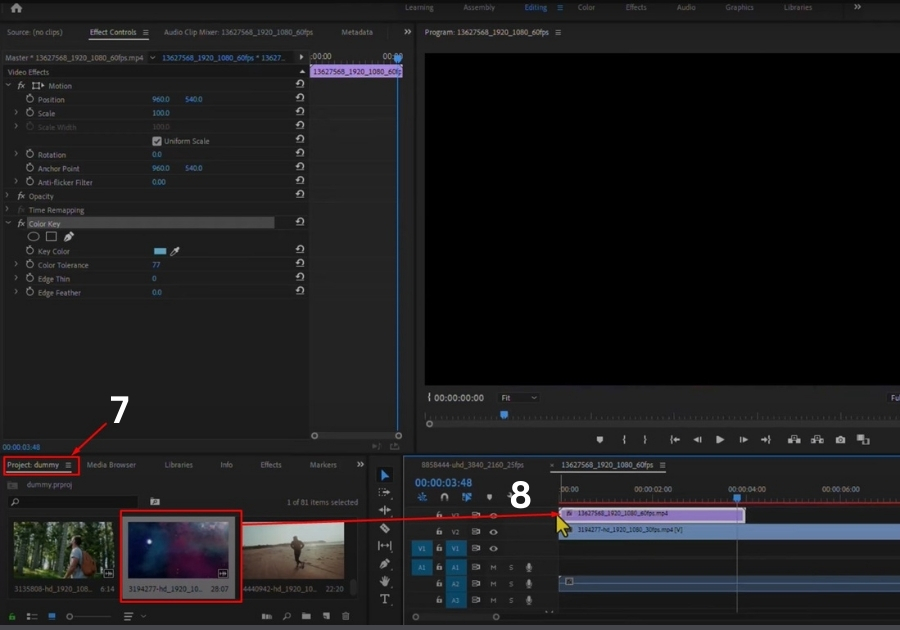
Step 4: Add a New Background
Want to spice things up? Go to your Project panel and import any background you like, this could be an image, video, or even a motion graphic.
Then, place the new background underneath your original video clip in the timeline. That’s it! Your new background is now visible, and your original subject looks like it’s right in front of it.
That’s it! You’ve successfully removed the background and replaced it with something new.
This trick works great for interviews, YouTube videos, presentations, or any project where you want to change the scene quickly.