Want to add some creative flair to your videos with a cool reverse effect?
CapCut makes it super easy to flip your footage backward and create eye-catching content. Whether you’re making a dramatic reveal or just want to experiment with different visual styles, reversing videos can add that extra wow factor to your projects.
Here’s exactly how to do it.
5 Steps to Reverse Your Video in CapCut PC
Step #1
Launch CapCut on your PC and click to start a new project. This sets up a fresh workspace for your video editing.
Step #2
Bring in the video you want to reverse by importing it into CapCut. Just click the import button and select your file.
Step #3
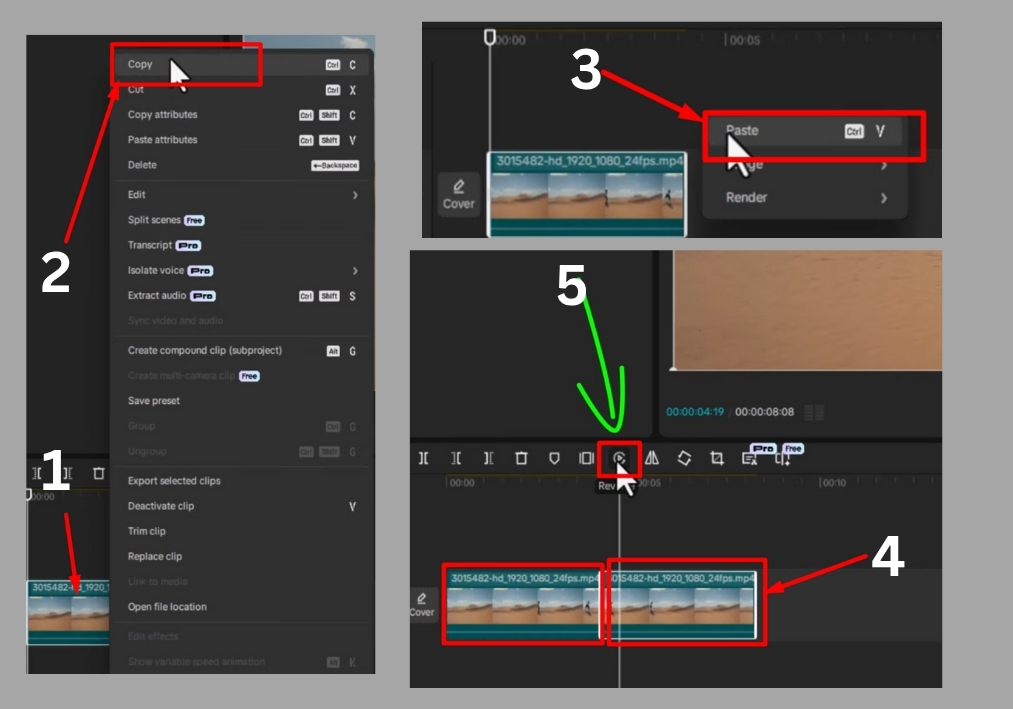
Drag your imported video clip to the timeline at the bottom of the screen. Click on the video clip in the timeline, then copy and paste it to create a duplicate. This is helpful if you want to keep the original clip untouched.
Step #4
Click on the video clip you want to reverse in the timeline. Make sure it’s highlighted so you can apply the effect.
Step #5
Look for the “Reverse” option in CapCut’s toolbar or settings. Click it, and CapCut will automatically process the video to play it backward. That’s it!