Want to turn shaky footage into smooth, professional-looking videos?
CapCut makes it super easy to stabilize videos on your PC. Whenever you are fixing a slightly wobbly clip or smoothing out a bumpy recording, this free tool has a great feature.
In this quick guide, I will show you the simple steps to stabilize your videos in CapCut, so your content looks polished and ready to share!
Easy Guide to Stabilizing Videos in CapCut PC
Step #1
Launch your CapCut software on your PC and create a new project.
Step #2
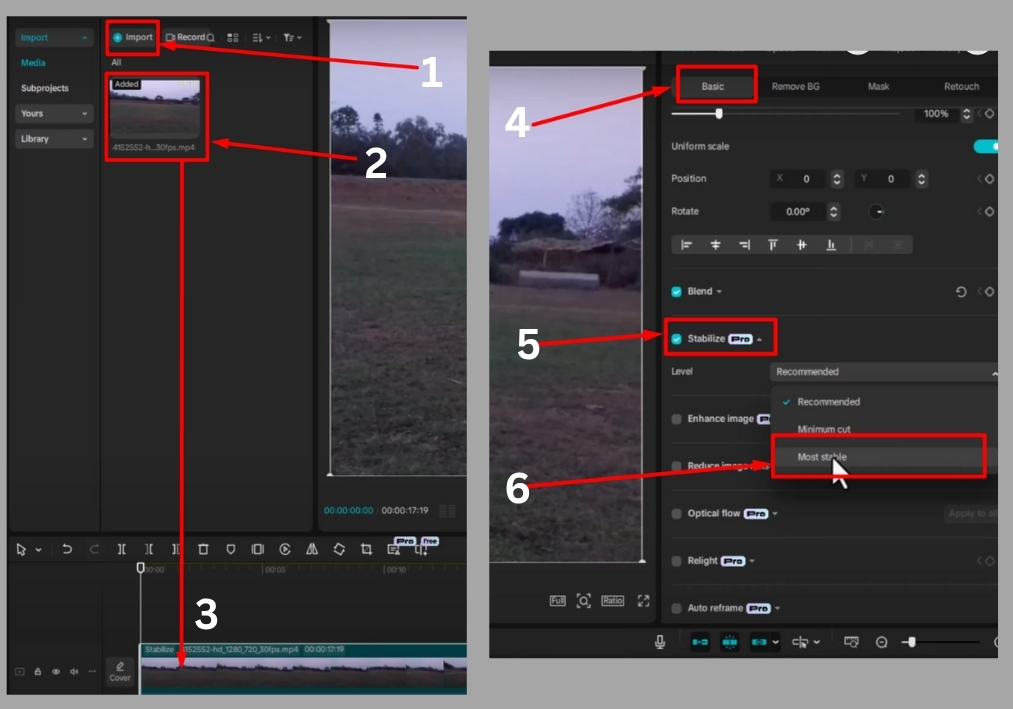
Click to import the video you want to stabilize. Once it’s loaded, drag the video clip to the timeline at the bottom of the screen.
Step #3
Click on the video in the timeline to highlight it. This tells CapCut which clip you are working on.
Step #4
Look to the right side of the screen and click on the “Video” section. Under the “Basic” tab, scroll down until you see the “Stabilize” option. Click it to get started.
Step #5
CapCut’s stabilization tool is awesome; it analyzes your video’s motion and smooths out the shakiness automatically. You will see a few options:
- Recommended: Great for slightly shaky footage.
- Minimum Cut: Good for mild wobbles with less cropping.
- Most Stable: Perfect for really bumpy videos, but it will crop your video a bit more.
Pick the one that matches how shaky your footage is. Keep in mind that stronger stabilization might crop the edges of your video slightly, so choose what works best for your project.
Step #6
After selecting your stabilization level, CapCut will start processing the video. Once it’s done, hit the play button to preview your clip. Check if the shakiness is gone and the video looks smooth.
That’s it!
Your video is now stabilized and ready to shine. Save or export your project, and you are good to go.