Working with separate audio and video files may look complicated, especially when they are out of sync. If you have ever dealt with audio that doesn’t match the video timing, you know how frustrating it can be.
Thankfully, CapCut makes this process incredibly simple with its built-in sync feature that automatically handles the heavy lifting for you.
Let’s go through exactly how to do it.
Sync Audio and Video in CapCut
Step #1
Open CapCut on your PC and click to create a new project. Now import the video and audio files you want to sync. Just click the import button, select your files, and they are ready to go.
Step #2
Once imported, drag your video and audio clips down to the timeline.
Step #3
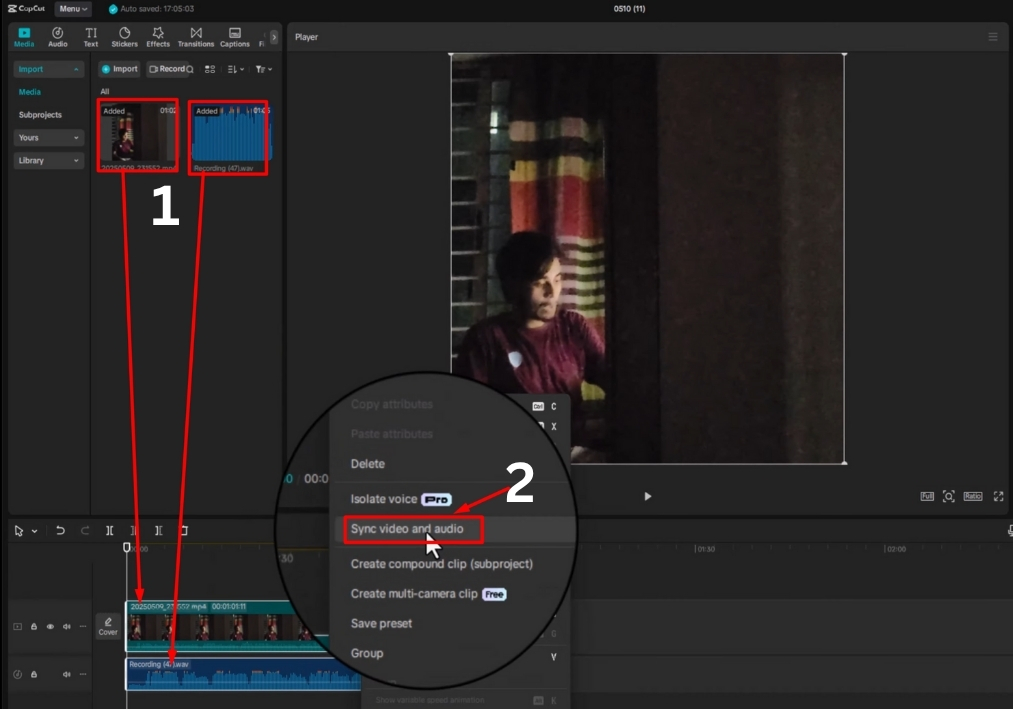
Click and drag to highlight both the video and audio tracks in the timeline. Make sure they are both selected before moving on.
Step #4
Right-click on the selected clips, then choose the “Sync Video to Sound” option. CapCut will automatically analyze the audio and video, adjusting their timing to make sure everything lines up perfectly.
And that’s it!
Your audio and video are now perfectly synced in CapCut on your PC. You are ready to export your project and share it with the world.