Moving your precious photos and videos from your iPhone to your PC is easy to do. Whether you’re using a laptop or desktop computer, the process is straightforward and takes just a few minutes.
With a simple USB cable and the built-in Windows Photos app, you’ll have all your memories safely stored on your computer in no time.
Simple Guide to Transfer Photos from iPhone to PC
Step # 1
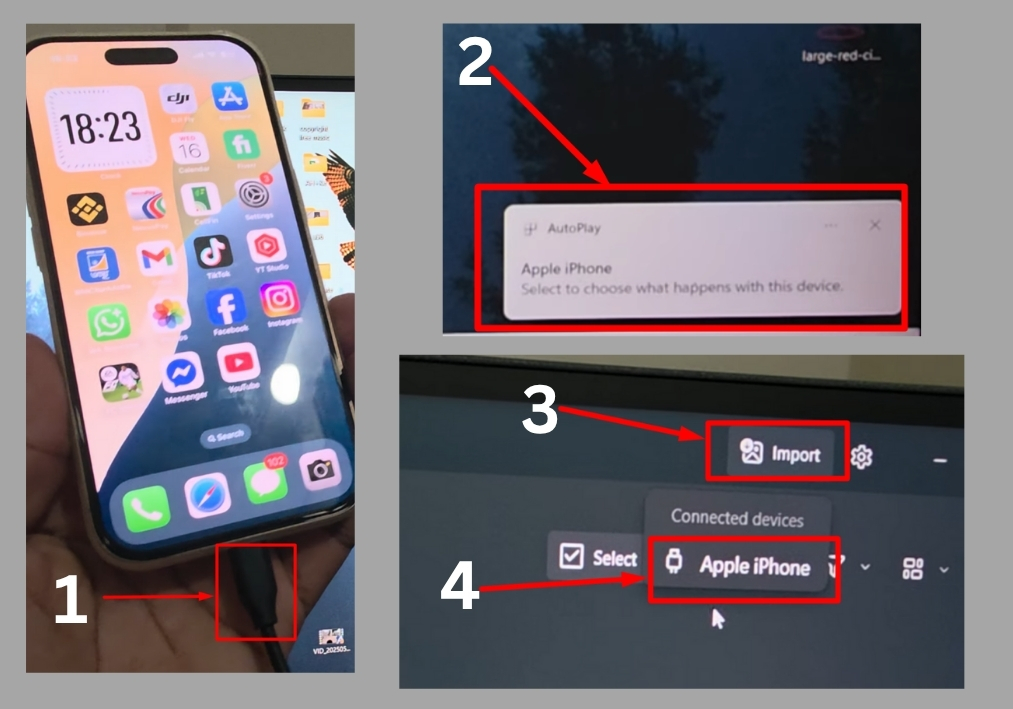
Take your iPhone’s USB cable and plug it into your PC or laptop. Once connected, you’ll see a pop-up notification on your iPhone asking for permission to trust the computer.
Step # 2
On your PC, head to the Start menu and type “Photos” to find the Windows Photos app. Click to open it. This app is your go-to for managing images and videos.
Step # 3
In the Photos app, look at the top-right corner for the “Import” button. Click it, then select “Apple Device” from the options. This tells the app to pull photos and videos from your iPhone.
Step # 4
Give it a few seconds, and you’ll see all your iPhone photos and videos loading in the Photos app. If it’s taking too long or you want to start over, you can hit “Cancel” to reload.
Step # 5
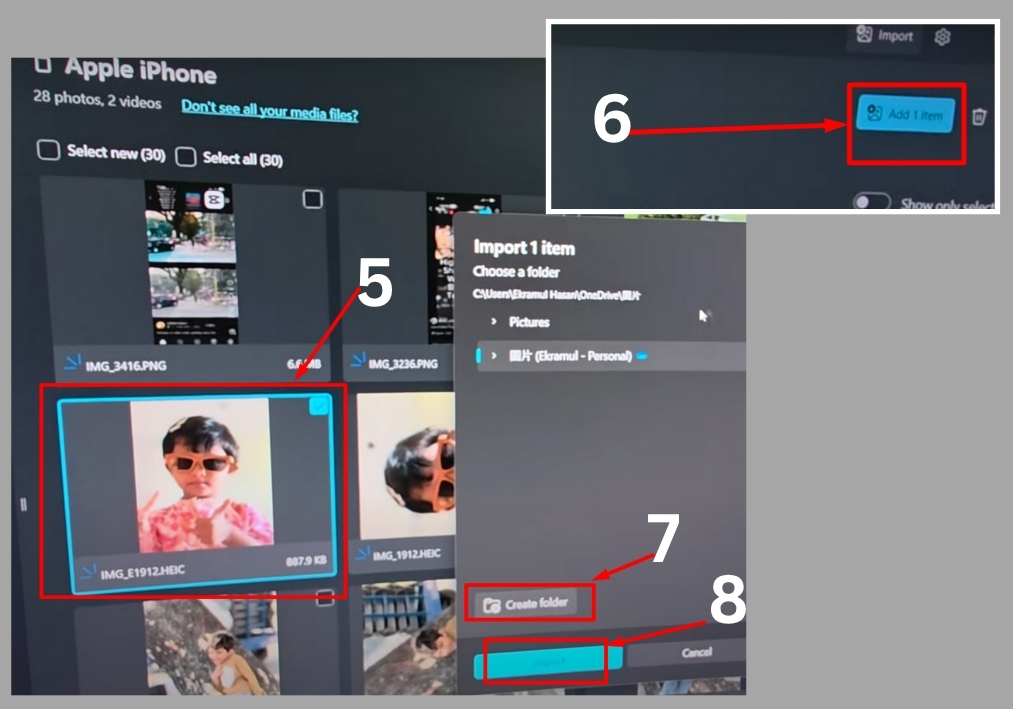
Browse through the loaded photos and pick the ones you want to transfer. For example, if you only want a specific photo or video, click on it to select it. You can select multiple items if needed.
Step # 6
After selecting your photos, decide where you want to save them on your PC. You can create a new folder for organization. For instance, name it “Test” or something that makes sense to you. Click “Create” to make the folder, then hit “Import” to start transferring.
Step # 7 (Optional)
If you want to back up your photos to iCloud as well, you’ll need to add your iCloud account to your Windows PC. Follow the prompts to sign in, and your photos can sync to the cloud for extra security.
Step # 8
Once the import is complete, head to the folder you chose (like “Test”) to confirm your photos and videos are there. You’re all set!
That’s it!
Transferring photos from your iPhone to your PC is quick and easy with a cable. Just connect, import, and save, done!