Need to move your photos from your Samsung phone to your computer?
Whether it’s vacation shots or everyday snaps, transferring them is super easy with a USB cable and a few clicks.
In this quick guide, I’ll walk you through the easiest way to transfer your photos to a Windows PC using just a USB cable and the built-in Photos app.
Steps to Transfer Photos from Samsung to a Computer
Step #1
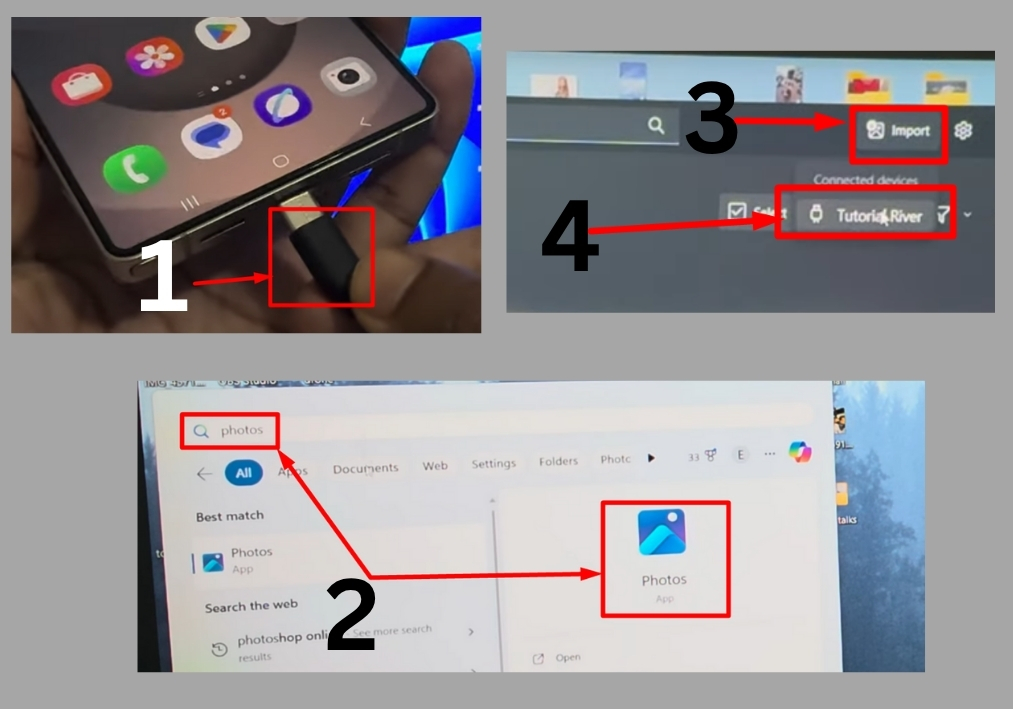
Take your USB cable and plug one end into your Samsung phone and the other into your PC. Make sure your phone is unlocked so your PC can detect it.
Step #2
Click the Start menu on your Windows PC and type “Photos” in the search bar. Hit Enter to open the Photos app.
Step #3
Once the Photos app is open, look at the top-right corner of the screen. You’ll see an Import button. Click it to start the process.
Step #4
After clicking Import, your PC will detect your connected Samsung phone. Select your device from the list that pops up. Your phone’s files, including photos and videos, will start loading.
Step #5
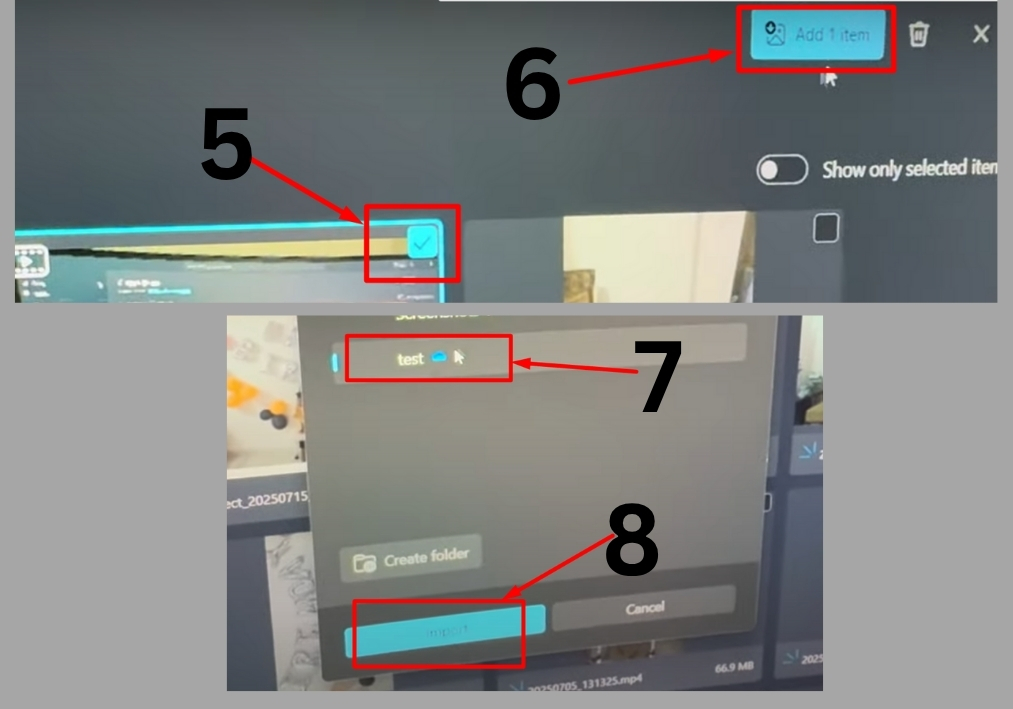
Once the files load, you’ll see all the photos and videos stored on your Samsung phone. For example, if you want to transfer a video that’s 537 MB, just click on it to select it. You can choose multiple files if needed.
Step #6
After selecting your photos or videos, click Add Item. Then, hit Import to start transferring the files. For a 537 MB video, the transfer might take just 5 seconds or so, depending on your PC and cable.
Step #7
Once the import is done, head to your PC’s storage. Navigate to the folder where your imported files are saved. You’ll see your transferred photos or videos right there.
That’s it!
Transferring photos from your Samsung phone to your Windows PC is quick and painless. Just plug in your phone, open the Photos app, and import your files with a few clicks.